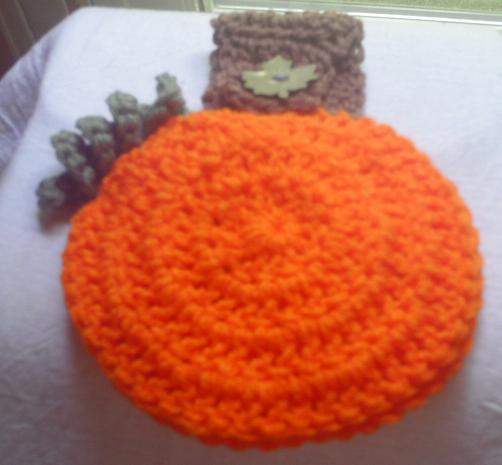
Scarecrow Towel Topper-
Aran, Brown, Gold/Yellow, Small amounts: red, orange
I hook
3 Buttons
1 small plastic kid's bracelet (used to be called Jelly Bracelets) or a wire ring 3"
Yarn needle
Front of Scarecrow:
Aran Yarn and I hook-
Chain 4
12 DC into 4 chain from hook. Join with slip stitch. (12 DC)
Chain 3
2 DC each stitch around. Join with Slip Stitch (24 DC)
Chain 3
2 DC in first stitch * 1 DC in next stitch 2 DC in next stitch Continue around * Join with slip stitch. (36DC)
Chain 3
2 DC in first stitch * 1 DC in next 2 stitches 2 DC in the next stitch. Continue around * Join with slip stitch(48DC)
Fasten off yarn and weave in ends.
Sew on 2 buttons for eyes, small orange nose, red mouth
Straw/Hair:
Attach gold/yellow yarn to top of scarecrow.
Chain 6. Slip stitch in each chain. Slip stitch to top.
*Slip stitch in next stitch.
Slip stitch in next stitch, Chain 6, slip stitch in each chain, slip stitch in same stitch.*
Repeat *-* twice.
Fasten off. Weave in ends.
Attach gold/yellow yarn to bottom of scarecrow.
Chain 6. Slip stitch in each chain. Slip stitch to top.
*Slip stitch in next stitch.
Slip stitch in next stitch, Chain 6, slip stitch in each chain, slip stitch in same stitch.*
Repeat *-* 6 times.
Fasten off. Weave in ends.
Back of Scarecrow:
Aran Yarn-
Chain 4
12 DC into 4 chain from hook. Join with slip stitch. (12 DC)
Chain 3
2 DC each stitch around. Join with Slip Stitch (24 DC)
Chain 3
2 DC in first stitch * 1 DC in next stitch 2 DC in next stitch Continue around * Join with slip stitch. (36DC)
Chain 3
2 DC in first stitch * 1 DC in next 2 stitches 2 DC in the next stitch. Continue around * Join with slip stitch(48DC)
Fasten off yarn and leave long tail to sew back to front.
Towel Ring:
With aran yarn-
Attach yarn to ring/bracelet.
Single crochet around the ring/bracelet.
Chain 1
Slip stitch around each stitch around.
Fasten off and leave long tail to attach to the scarecrow.
Sew top 1/2 of Ring/Bracelet to the 3 round of the back of the scarecrow.
Place front and back of Scarecrow together and sew 1/2 way around Scarecrow leaving bottom open.
Hat:
Attach brown yarn to top of scarecrow. Evenly crochet 11 single crochet across the top. Turn chain 2, 3 hdc in each of the back loop of each stitch.
Turn Chain 2. 1 HDC in each of the unworked loops. Slip stitch to beginning.
Fasten off. Weave in ends.
Hanger:
Attach brown yarn to top of scarecrow behind hat.
Evenly crochet 7 single crochet across.
*Turn Chain 2 HDC across row (7hdc)
Repeat * for 4 rows
Turn Chain 2 HDC decrease the first 2 stitches HDC the next 3 stitches HDC decrease the last 2 stitches (5hdc)
Turn Chain 2 HDC in each stitch across row (5hdc)
Turn Chain 2 HDC in the first stitch Chain 2 Skip the next 2 stitches. HDC in the last 2 stitches (3 hdc 2 chains)
Turn Chain 1 SC in each stitch across including chain 2. (5sc)
Fasten off and weave in ends.
Sew button to bottom of hanger.
Fold hanger in half and button.